
We have two theories around cheese boards. A) They’re porn for women. If we’re on Pinterest and see a heaping pile of charcuterie on a slab, our a*ses are clicking on that picture so fast. And B), it’s not humanly possible to not light up at the sight of a badass cheese platter. It’s just not. So we’re very excited to have the creator of Boards By Mae – badass Mae Bergan – on the blog today giving us the scoop on how to assemble the greatest cheese board for any occasion. Take it away, Ms. Mae:

I began starting making cheese boards about four years ago. After moving to New York, working late and having little time to prepare full meals – a cheese board was an easy (and filling) solution, although, definitely more expensive.. and fattening.
As the years went on, I began making them for family and friend’s functions and wanted to make each one more beautiful and tasteful from the last. I learned all about different types of cheeses, regions they originated from, what the perfect accoutrement is to pair with each cheese and meat, and the perfect quantities for the amount of guests being served. My cheese books began to outweigh by cook books, and my (now) fiancé was concerned most of my money was going to local cheese shops.
Now, as an interior designer, I think my boards have really been taken up a notch. My eye for design has been my hardest critic. I recently launched my own website, Boards by Mae and am being hired to design and set up boards for all sorts of events and parties. The next phase for the shop will be to launch handmade wooden boards to sell (and rent as part of my collection packages), that I’m actually working on with my dad, an interior architectural woodworker where I can attribute most of my passion for design.
I truly love creating boards for my customers. I’m inspired by the lost, old world of at-home hostessing, and love to bring that beautiful curation back to entertaining. Each board is designed to be the central space where friends and family gather round.
Here, I share with you 5 tips I’ve learned over the years to design the most perfect cheese board:
1. Establish a budget
Ok, I hate budgets – but they’re vital when creating a cheese board. You can very quickly spend your entire paycheck. Once your budget is solidified everything else will have structure and you can take it from there.
2. Pick a theme
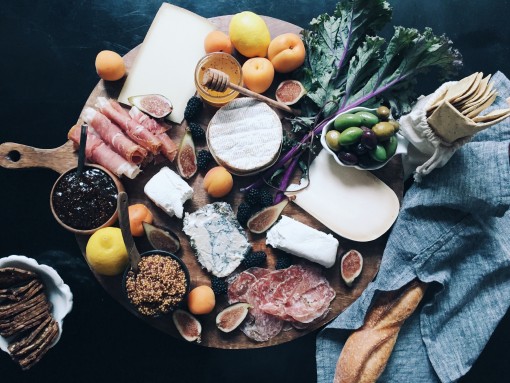
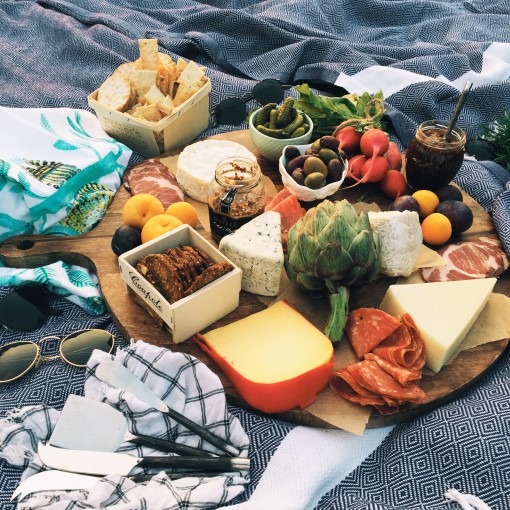
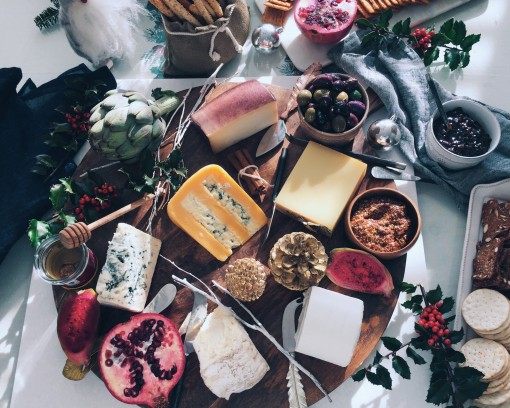
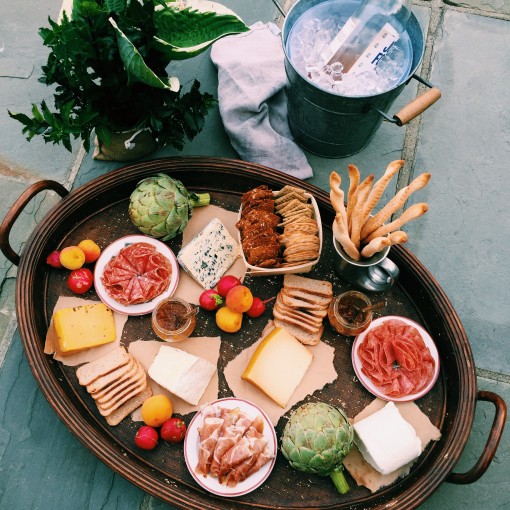
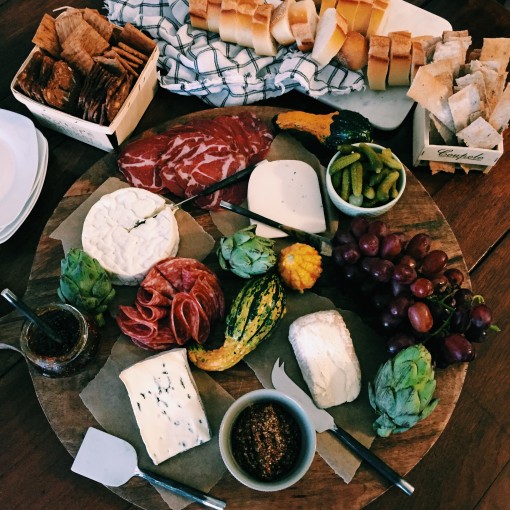
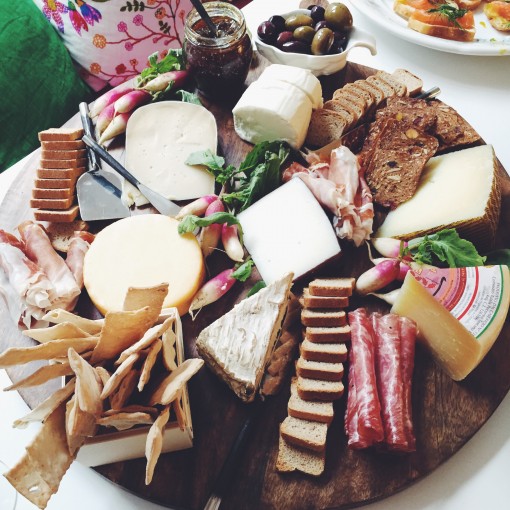
Ok, I hate themes, too. But what I mean more is what vibe are you try to portray with your board? A lot of the time, the cheese board is the first thing your guests will see and engage with, so it needs to really set the tone for your event. Is it a backyard summer night mediterranean soiree? If so, load up on the harder cheeses, fresh figs, and citrus. Is it a black tie holiday cocktail party? You bet there will be dark chocolate and pomegranate seeds.
3. Analyze the amount of guests/cheese ratio
I’m an over buyer by nature, so it took some serious training to not buy too much meats and cheeses, etc. The rule of thumb, 3-4 ounces for person. If you’re serving a smaller group (under 20 people), it’s ok to have more types of cheeses at less quantities. For large groups (over 20 people), keep the quantities higher, and have less different types of cheeses.
4. Do your research and make your shipping list
Once your theme is selected, Pinterest search your heart out to see what sort of foods and visuals come to life when people thing of the vibe you’re looking for. Then make your shopping list. List out cheeses, meats (if serving), jams/honeys/sauces, and anything else you want to add.
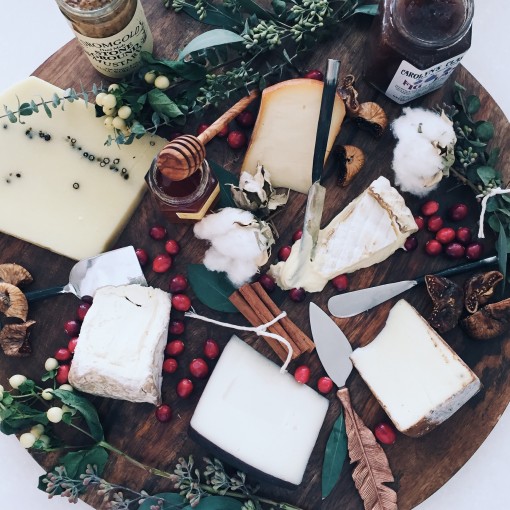
5. Layer. Layer. Layer.
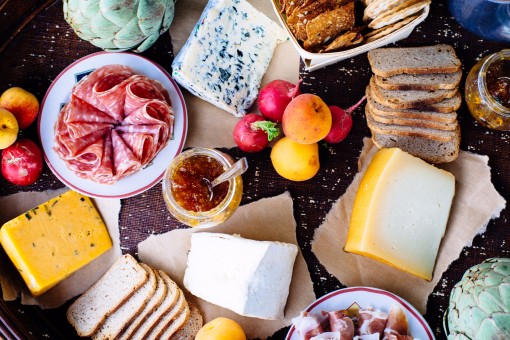
I always start with cheese. It should acclimate to room temperature before served anyways, so it’s the perfect first step. Once the cheeses are on your board, layer on the crackers/breads, then layer on the small bowls filled with jams, honey, etc. After that, add in your meats. Less is more with meats, from both an aesthetic and appetite perspective. You can always replenish throughout the night. After the main characters are all added, layer on your decorate (and sometimes decorate and edible) elements — the fresh fruits, hand tied herb bunches, fresh greenery, etc. Last layer? Utensils! Essential.
All in all, it isn’t a quick or easy task. It takes creativity, money, and time. But if you take the time, your reward will be a beautiful board you will be proud of and your guests will surely love.
— Mae
Mae is an interior designer, and cheese board builder, living and working in Brooklyn
You can find her work at boardsbymae.com and @maebergan
Other works of art by Mae:

xoxo,


More cheeeese please!!!
Mae,
You are incredibly talented! I wish you lived closer so I could have you make a board for me. Also, wishing you all the best in your marriage.
Mrs. Garstka